Netlify 前端自动化部署工具,只需要推送博客源码,Netlify就会自动帮你部署博客。
一、安装
hugo搭建博客
·需要配置MemE主题的话,netlify支持子模块主题方法安装主题
1
2
| 子模块主题方法
$ git submodule add https://github.com/reuixiy/hugo-theme-meme.git themes/meme
|
博客根目录添加官方示例netlify.toml配置文件:
 1
 2
 3
 4
 5
 6
 7
 8
 9
10
11
12
13
14
15
16
17
18
19
20
21
22
23
24
25
26
27
28
29
30
| [build]
publish = "public"
command = "hugo --gc --minify"
[context.production.environment]
HUGO_VERSION = "0.74.1"
HUGO_ENV = "production"
HUGO_ENABLEGITINFO = "true"
[context.split1]
command = "hugo --gc --minify --enableGitInfo"
[context.split1.environment]
HUGO_VERSION = "0.74.1"
HUGO_ENV = "production"
[context.deploy-preview]
command = "hugo --gc --minify --buildFuture -b $DEPLOY_PRIME_URL"
[context.deploy-preview.environment]
HUGO_VERSION = "0.74.1"
[context.branch-deploy]
command = "hugo --gc --minify -b $DEPLOY_PRIME_URL"
[context.branch-deploy.environment]
HUGO_VERSION = "0.74.1"
[context.next.environment]
HUGO_ENABLEGITINFO = "true"
|
二、部署
1.Netlify
Netlify 是一家云计算公司,为静态网站提供托管和 serverless 后端服务。
关键在于,与 GitHub 相比,Netlify 托管的网站速度更快,也更稳定。
本文就来介绍如何部署一个 Hugo 网站到 Netlify 和一些额外设置。
PS:netlify需要科学上网
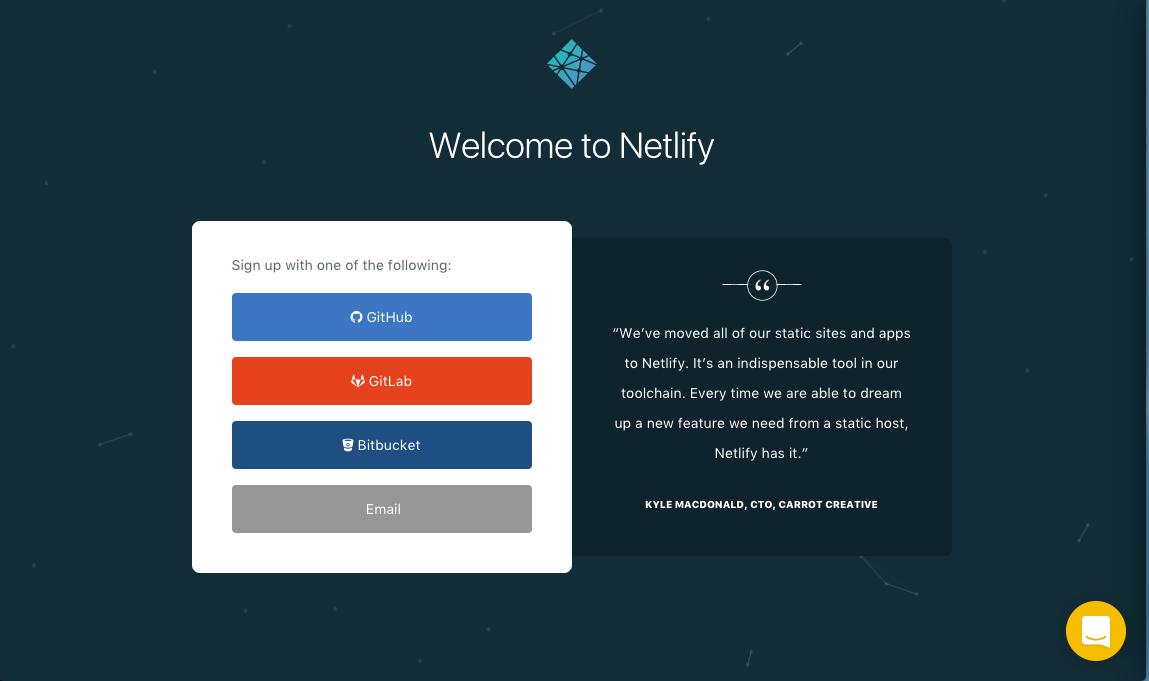 ◎ Netlify Sign up
~以下示例使用GitHub,但其他git提供程序将遵循类似的过程。
1. 选择GitHub将显示一个身份验证授权模式。选择“授权应用程序”。
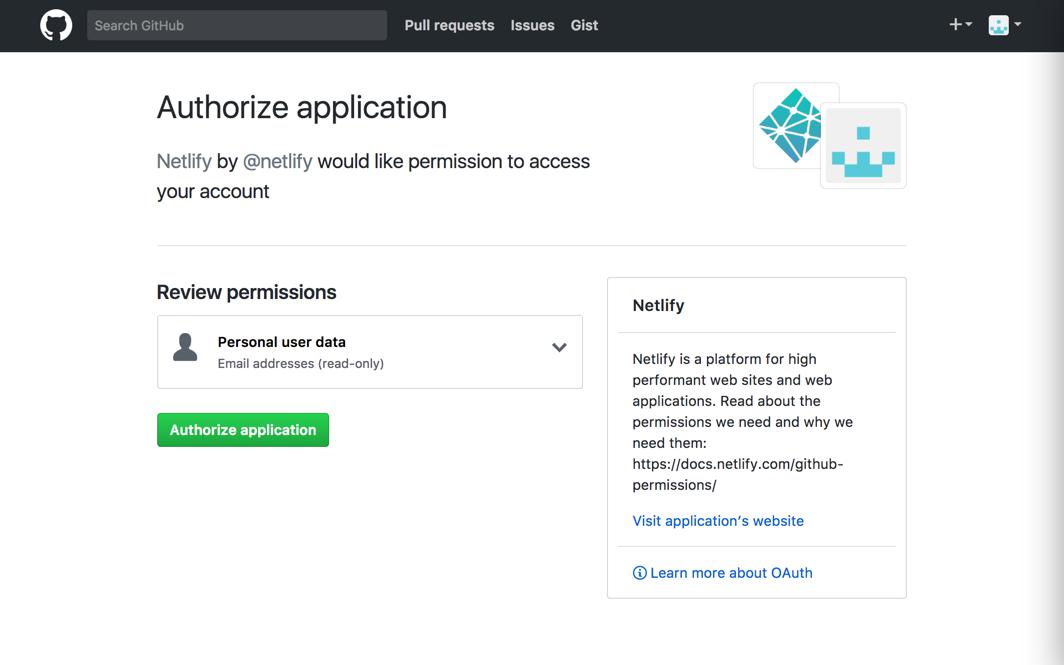 ◎ Netlify-1
2. 创建具有持续部署的新站点。
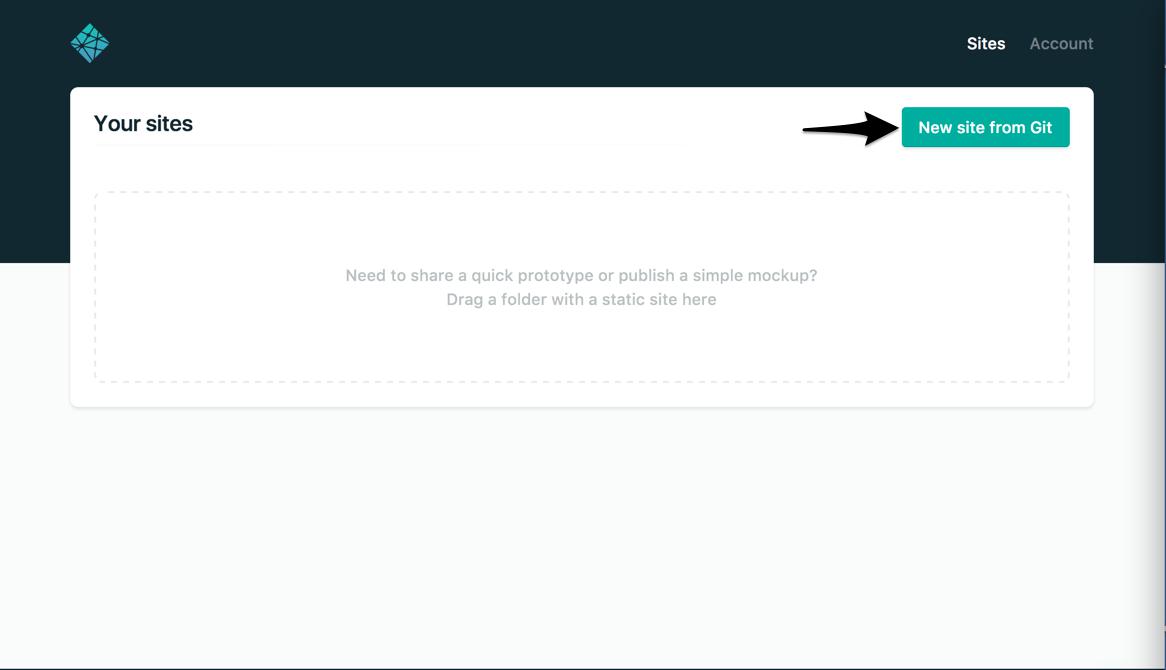 ◎ Netlify-2
3. 选择要用于连续部署的存储库。如果您有大量的存储库,则可以使用回购搜索实时过滤它们:
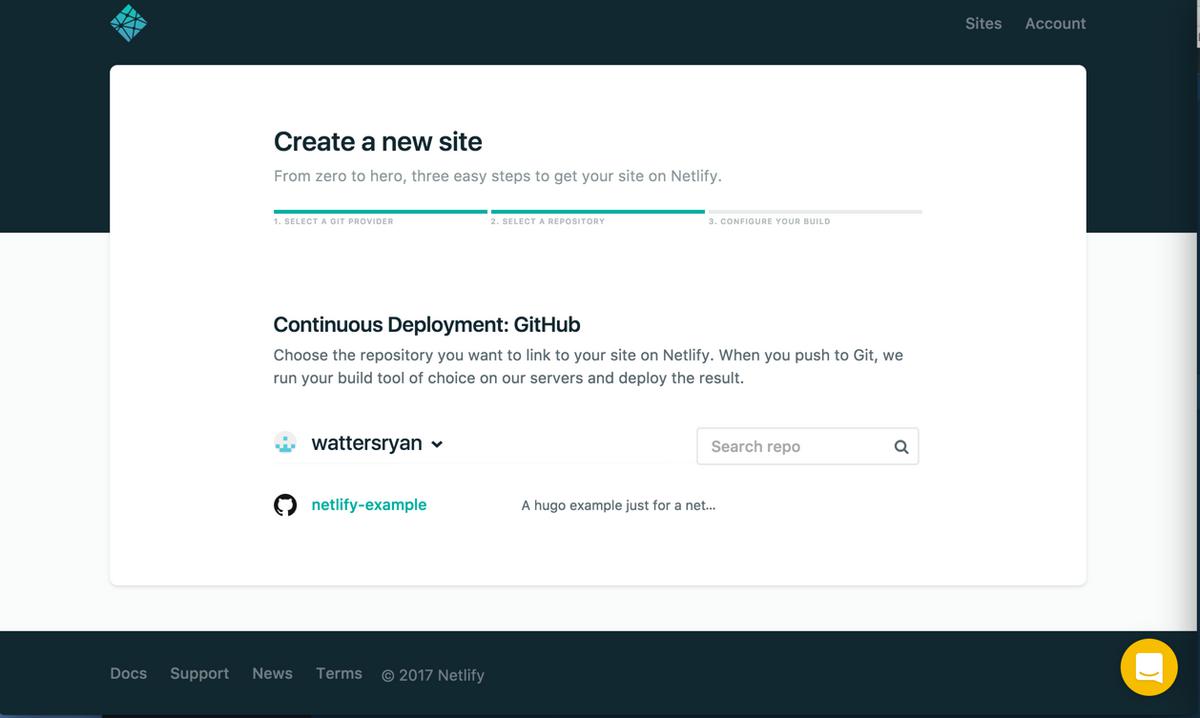 ◎ Netlify-3
4. 选择后,将带您进入屏幕进行基本设置。在这里,您可以选择要发布的分支,构建命令以及发布(即部署)目录。发布目录应反映您在站点配置中设置的目录,默认目录为public。以下步骤假定您要从master分支发布。
1
2
3
| $ 默认
$ Build command:hugo # 或者不填,因为后面会在博客项目中引入netlify.toml配置文件
$ Publish directory:public # 静态网页生成的文件夹
|
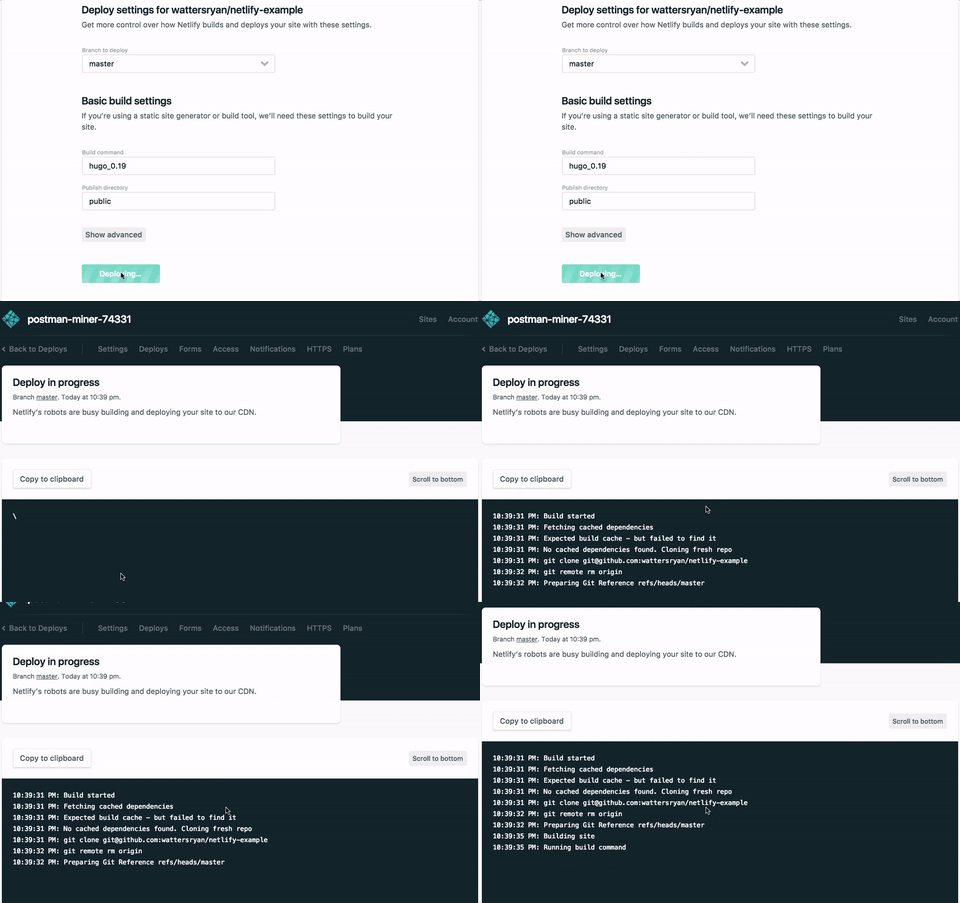 ◎ Netlify-4
·Netlify配置文件可能很难理解,并且适合于不同的环境,所以您可能会从官方示例的netlify.toml配置文件中得到启发:
 1
 2
 3
 4
 5
 6
 7
 8
 9
10
11
12
13
14
15
16
17
18
19
20
21
22
23
24
25
26
27
28
29
30
| [build]
publish = "public"
command = "hugo --gc --minify"
[context.production.environment]
HUGO_VERSION = "0.74.1"
HUGO_ENV = "production"
HUGO_ENABLEGITINFO = "true"
[context.split1]
command = "hugo --gc --minify --enableGitInfo"
[context.split1.environment]
HUGO_VERSION = "0.74.1"
HUGO_ENV = "production"
[context.deploy-preview]
command = "hugo --gc --minify --buildFuture -b $DEPLOY_PRIME_URL"
[context.deploy-preview.environment]
HUGO_VERSION = "0.74.1"
[context.branch-deploy]
command = "hugo --gc --minify -b $DEPLOY_PRIME_URL"
[context.branch-deploy.environment]
HUGO_VERSION = "0.74.1"
[context.next.environment]
HUGO_ENABLEGITINFO = "true"
|
 ◎ Netlify Sign up
 ◎ Netlify-1
 ◎ Netlify-2
 ◎ Netlify-3
 ◎ Netlify-4